taskman — A tutorial
Our tutorial is a simple API that lets you create tasks, edit them, and mark them as finished.
The basic application
Let’s go ahead and create our app and declare our resources. They won’t do anything for now, but will help us get a firm idea of how the API is laid out.
Add the following to a file and save it as taskman.py
from findig.json import App

app = App()

@app.route("/tasks/<id>")
@app.resource
def task(id):
    return {}

@app.route("/tasks/")
@task.collection
def tasks():
    return []
We want our API to serve JSON resources, so we’ve imported and initialized
findig.json.App. We could’ve supported a different data format, but
we’d have to write the code to convert the resources ourselves, since Findig
only includes converters for JSON. For this tutorial we’ll just stick to JSON
(it’s pretty darn good!).
Next, we declare a resource called task. This resource is going to
represent a single task, and provide an interface for us to delete and update
individual tasks. There’s quite a bit going on here:
@app.route("/tasks/<id>")assigns a URL rule to our task resource. The URL rule tells findig what sort of URLs should route to our resource. The second part of the rule is interesting; by enclosingidin angle brackets, we’ve created a variable part of the URL rule. When matching a URL, Findig will match the static part of the rule exactly, but try to match other parts of the URL to the variables. So for example,/tasks/fooand/tasks/38will route to this resource, using'foo'and'38'as the id (variable part) respectively. This kinda important, because we can use just one resource to group all of our tasks together, but use the variable part URL to identify the exact task that we’re referring to. By the way, here’s the documentation forapp.route.@app.resourcedeclares a resource.app.resourcewraps a resource function and returns afindig.resource.Resource. This means that in our code,taskwill be replaced by a Resource object (Resources act like functions, so you can still call it if you want to).task(id)is our resource function for a task. Notice that it takes an argument calledid. This is because of our URL rule; for every variable part in a URL rule, a resource function must accept a named argument (keyword arguments work too) that matches the variable part’s name. So when task is called by Findig, it will be called with an id that’s extracted from the URL. Resource functions are supposed to return the resource’s data (in other words, what should be sent back on a GET request). Our resource function returns an empty dictionary. That’s because the JSON converters know how to work with dictionaries; if we were to send a GET request to any task right now (example:GET /tasks/foo) we would receive an empty JSON object as the response.
The next block declares our tasks collection. We’ll use it to get a list
of all of our tasks, and to add new tasks to that list. Bit by bit, here’s
what is going on in that code:
@app.route("/tasks/")should be familiar. We’re once again assigning a URL rule, only this time there are no variable parts so it will match only one URL (/tasks/).@task.collectiondeclares tasks as a collection containingtaskresource instances. Remember howapp.resourceturned our resource function into aResource? Well that’s where the collection function comes from. Here,collection()wraps a resource function and turns it into aCollection(which are callable, just like a Resource—in fact, they are Resources).tasks()is our resource function for the tasks collection. We return an empty list because the JSON converters know how to turn an iterable into a JSON list; if we sentGET /tasksto our API, we’d get an empty JSON list as the response.
Serving it up
If we were deploying a production application, we’d be using a web server like Apache to serve up our API. But since this is a measly tutorial, we can get away with using Werkzeug’s built-in development server (see that ‘development’ in front of server? It means you should only use it during development ;)).
Go ahead and add this to the bottom of taskman.py:
if __name__ == '__main__':
    from werkzeug.serving import run_simple
    run_simple("localhost", 5000, app, use_reloader=True, use_debugger=False)
This serves up our application on port 5000 on the local machine.
use_reloader=True is a handy setting that reloads the application anytime
your change the source file. You might be tempted to set use_debugger=True,
but don’t; we set it to False (the default) deliberately to make the point
that since the werkzeug debugger is tailored for HTML, it is almost certainly
useless for debugging a Findig app.
Adding our data models
We’re going to need to store our tasks somewhere. Findig uses data models to figure out how to interface with stored resource data. This section is a little long-winded, because it presents the roundabout way of declaring models, and then promptly throws all of that away and uses a shorter method instead (don’t hate, okay? This is still a tutorial, so it’s important for you to grasp the underlying concepts).
Explicit data models
We can declare data model functions to instruct Findig on how to access stored data for each resource. Whenever we do that, we’re using explicit data models. That’s what we’ll cover in this section.
We won’t use any of the code we add in this section in our final application, but it’s important that we go through it anyway so that you grasp the underlying concepts. If you don’t care for any of that, you can probably skip ahead to Data sets (but don’t blame me if you don’t understand how they work!).
Let’s start with the task resource. Remember that we want to use that
resource to update and delete individual tasks. Add this code to taskman.py
TASKS = []

@task.model("write")
def write_task(data):
    TASKS[task.id] = data

@task.model("delete")
def delete_task():
    del TASKS[task.id]
TASKS = [] sets up a global module-level list that tracks all of our tasks.
Since this is throwaway code anyway, there’s no harm in storing our tasks in
memory like this; it’ll never really get used! Were this a production application,
then you would be fully expected to use a more responsible data storage backend.
And if you didn’t, well, you’d just have to face the consequences, wouldn’t you?
Now, the first interesting thing happening here is the @task.model("write")
declaration. This is declaring a write_tasks as a function that can write new data
for a specific task. It gets passed a mapping of fields, directly converted
from data send by the requesting client. The next interesting thing is
task.id. During a request to our task resource, task.id will bind to
the value of the id URL variable.
Tip
Anytime a URL rule with variable parts is used to route to a resource,
Findig binds the values of those variables to the resource for the duration
of the request. This binding is completely context safe, meaning that even
when requests are running on multiple threads, {resource}.{var} will always
bind to the correct value.
Similarly, task.model("delete") declares delete_task as a function that deletes
a task. Delete model functions don’t take any arguments.
Whenever we introduce model functions, Findig will usually enable additional request methods which correspond somewhat to the model functions. This table gives the model functions, their signatures, and corresponding request methods:
| Model function | Request method | Supported resource type |
|---|---|---|
write(data:mapping) |
PUT | Resource |
delete() |
DELETE | Resource |
make(data:mapping) -> token |
POST | Collection |
You may notice that a “make” model is to be attached to a
Collection rather than a
Resource. It must however, create a resource instance
of the Resource that the collection collects.
The token returned from the “make” model function is a special mapping with
enough data to identify the resource instance that was created. By default,
you should make sure that it has at least the same fields as the arguments to
the resource instance’s resource function.
Anyway, from the table, you should be able to see that our task resource
now supports PUT and DELETE requests. Go ahead and test them out
(Remember to send application/json content with your PUT requests)!
But wait, we’re still not done. Remember that GET /tasks/<id> still always
returns an empty JSON object, no matter if we’ve already PUT a task there.
We need to fix that by updating the resource function to return the appropriate
task data; change you definition of task to look like this:
@app.route("/tasks/<id>")
@app.resource
def task(id):
    return TASKS[id]
But what if we get a URL that includes an id that is not in TASKS? That’s okay!
Findig automatically converts a LookupError into an HTTP 404 response.
So when the invalid id throws a KeyError
(a LookupError subclass), it won’t crash; it’ll tell the requesting
client that it doesn’t know what task it’s asking about. Of course, if you’re
still not convinced, you can go ahead and catch that KeyError and
raise a werkzeug.exceptions.NotFound error yourself.
Next, we’ll add the model for tasks:
@tasks.model("make")
def make_task(data):
    token = {"id": str(uuid4())}
    TASKS[token['id']] = data
    return token
update the resource function for our tasks collection:
@app.route("/tasks/")
@task.collection
def tasks():
    return TASKS
and finally add the following import to the top of the file:
from uuid import uuid4
Not a whole lot new is going on; In our “make” model, we’re using the built-in uuid.uuid4()
function to generate random ids for our tasks (nobody ever said our ids had
to be numeric!), and we’re storing the data receive with that id. Finally, we
return the id as part of the token (remember that the token needs to contain
at least enough data to identify the task instance, and here, all we need is
id!).
And that’s it! We’ve built out our explicit data model. Now, let’s go throw it away...
Data sets
Data sets are an alternative to explicit data model functions. They have the advantage of being far less verbose, but aren’t quite as flexible. However, for most resources, you may find that you don’t need that extra bit of flexibility, so a data set is perfectly fine.
Essentially, a data set is a special collection of records, each corresponding to a single resource instance. Instead of returning a straight-up list from a collection resource function, we can return a data set instead. Since a data-set is already an iterable object, we don’t actually lose anything by dropping one in where we would normally return a list or a generator. However, with a little coaxing, we can get Findig to inspect the data set and derive a model from it, so you don’t have to type one out.
We’re going to be using the included
findig.extras.sql.SQLASet (which requires SQLAlchemy) with an SQLite
table for our tasks. There’s also a findig.extras.redis.RedisSet, but
it relies on a redis server which you may not have on your system (that’s a
little beyond the scope of this tutorial). Unlike RedisSet, SQLASet does
require a table schema to be declared, so the code is a little more verbose.
Let’s dig in! Add this to taskman.py right after your app initialization:
db = SQLA("sqlite:///tasks.sqlite", app=app)
validator = Validator(app)


class Task(db.Base):
    id = Column(Integer, primary_key=True)
    title = Column(String(150), nullable=False)
    desc = Column(String, nullable=True)
    due = Column(DateTime, nullable=False)
and add the following imports:
from sqlalchemy.schema import *
from sqlalchemy.types import *
from findig.extras.sql import SQLA, SQLASet
Tip
If the above import gives you an ImportError, it means that you
don’t have SQLAlchemy installed. You’ll need to install it to continue
(try: pip install sqlalchemy in your shell, if you have pip).
All we’ve done here is declare an SQLAlchemy orm schema.
findig.extras.sql.SQLA is a helper class for using SQLAlchemy inside
a findig application. The first argument we pass here sets up the database
engine (we store them in an SQLite database called ‘tasks.sqlite’; you’ll need
to make sure that your application process has write permission to the working
directory so that it can create that file), and we pass our app as a keyword
argument.
After that, we declare our tasks table and its ORM mapping. We set up our schema with three columns (id, title and desc).
Next up, let’s use that schema to create an SQLA data set. Replace the declaration for your tasks collection with this code:
@app.route("/tasks/")
@task.collection(lazy=True)
def tasks():
    return SQLASet(Task)
So some interesting changes. First up, we’ve added the lazy=True argument
to task.collection. This gives Findig the heads-up that this resource
function returns a data set (meaning that simply calling it does not make any
queries to the database). As a result, Findig is able to inspect the return
value when setting things up. Since it is a data set, Findig uses that to add
our model functions for us.
To complete our transition, replace the resource declaration for task with
this code:
@app.route("/tasks/<id>")
@app.resource(lazy=True)
def task(id):
    return tasks().fetch(id=id)
findig.extras.sql.SQLASet.fetch() can be thought of as a query. It returns
the first matching item as a
MutableRecord, which Findig also knows how to
extract data model functions from.
As a result, we don’t need our data model functions anymore, so you should go ahead and delete them.
Validating data
At this point, we’ve developed a working web application, but it’s still incomplete. Why, you ask? Because we haven’t actually put an constraints on the data that we receive. As it stands, we could send any old data to our API and get away with it, without a peep in protest from the application.
Note
Well that’s not strictly true; since we’ve added an SQL schema for the tasks, SQLASet will try to make sure that any data that it receives conforms to the schema at the very least. Still, it doesn’t perform any checks on the actual values or do any type conversions for us, and so we need to do that ourselves.
So what sort of constraints are we talking? Let’s look at the fields in our task schema again, to get a better idea:
validator = Validator(app)


class Task(db.Base):
    id = Column(Integer, primary_key=True)
    title = Column(String(150), nullable=False)
    desc = Column(String, nullable=True)
    due = Column(DateTime, nullable=False)
First, let’s look at the id field. This field is an integer primary key, so
the engine will automatically generate one for us (as it does with all
integer primary key fields :D); we don’t need to put any constraints here
because we won’t be asking for one from the client.
Next there is the title field. It’s a string with a maximum length of
150 characters. It’s tempting to have our validation engine enforce this for us,
but if we pass a string longer than 150 characters to the database engine, it
will truncate it for us. I think that’s a reasonable compromise. We also see
that the field is marked as nullable=False; this meaans that it is
required.
Our desc field doesn’t have much in the way of constraints; it’s probably
okay to just let our user put any old thing in there.
Finally, our due field is meant to store a date/time. We should make sure
that whatever we receive from the client for ‘due’ can be parsed into a
date/time. Also, note that this field is also required.
Great! So let’s go set all of this up. The first thing we need to do is
create a Validator for our application.
Add this code right after you initialize your app:
validator = Validator(app)
and add this import:
from findig.tools.validator import Validator
Next up, let’s use the validator to enforce the constraints that we’ve
identified. First up, I think it’s a good idea to make sure that we don’t
get any extra fields. We can do that by adding this decorator at the top
of our resource declaration for task:
@validator.restrict("desc", "*due", "*title")
So what’s happening? We’re telling
the validator to only accept the fields desc, due and title. But
what’s with the *? If you guessed that the field is required, you’re right!
restrict() accepts a variable number of
field names, so we can restrict our resource input data to any number of
fields we want.
Tip
We’ve only set a validation rule for task, but what about tasks?
Since tasks is a collection of task instances, the validator will
check input for tasks with the rules we’ve defined for task by
default. If you want to disable this behavior, you can pass
include_collections=False to the validator constructor.
All we have to do now is check that the due date is date/time string, and
parse it into a datetime object.
With Validator.enforce, we
can supply a converter for the due field. A converter can by a simple type, a
magic string, or an application-defined function that takes a string as input
and returns the parsed output. Here’s what such a function can look like for
a date/time field like due:
def convert_date(string):
    import datetime
    format = "%Y-%m-%d %H:%M:%S%z"
    return datetime.datetime.strptime(string, format)
In fact, Validator.date is a
static method that simplifies this pattern; it takes a date/time format as its
argument and returns a converter function that parses a
datetime object using that format. That’s what we’ll use
to check our due field. Add this decorator to our task declaration:
@validator.enforce(due=validator.date("%Y-%m-%d %H:%M:%S%z"))
With that, we’ve set up validation for our request input. You should go ahead and try sending requests to the API we’ve created.
Calling our API
By now, we have a pretty decent API, but how exactly do we use it? First, let’s start our development server:
$ python taskman.py
 * Running on http://localhost:5000/ (Press CTRL+C to quit)
 * Restarting with stat
Our development server is running on port 5000. Calling our API is a
matter of sending application/json HTTP requests to the server. For testing,
you’ll need a program that can send application/json requests, since your
browser probably doesn’t provide an interface for this. The examples in this
section will use the command-line tool cURL,
but they’ll include all the details your need to send the requests with any
tool you prefer to use.
Tip
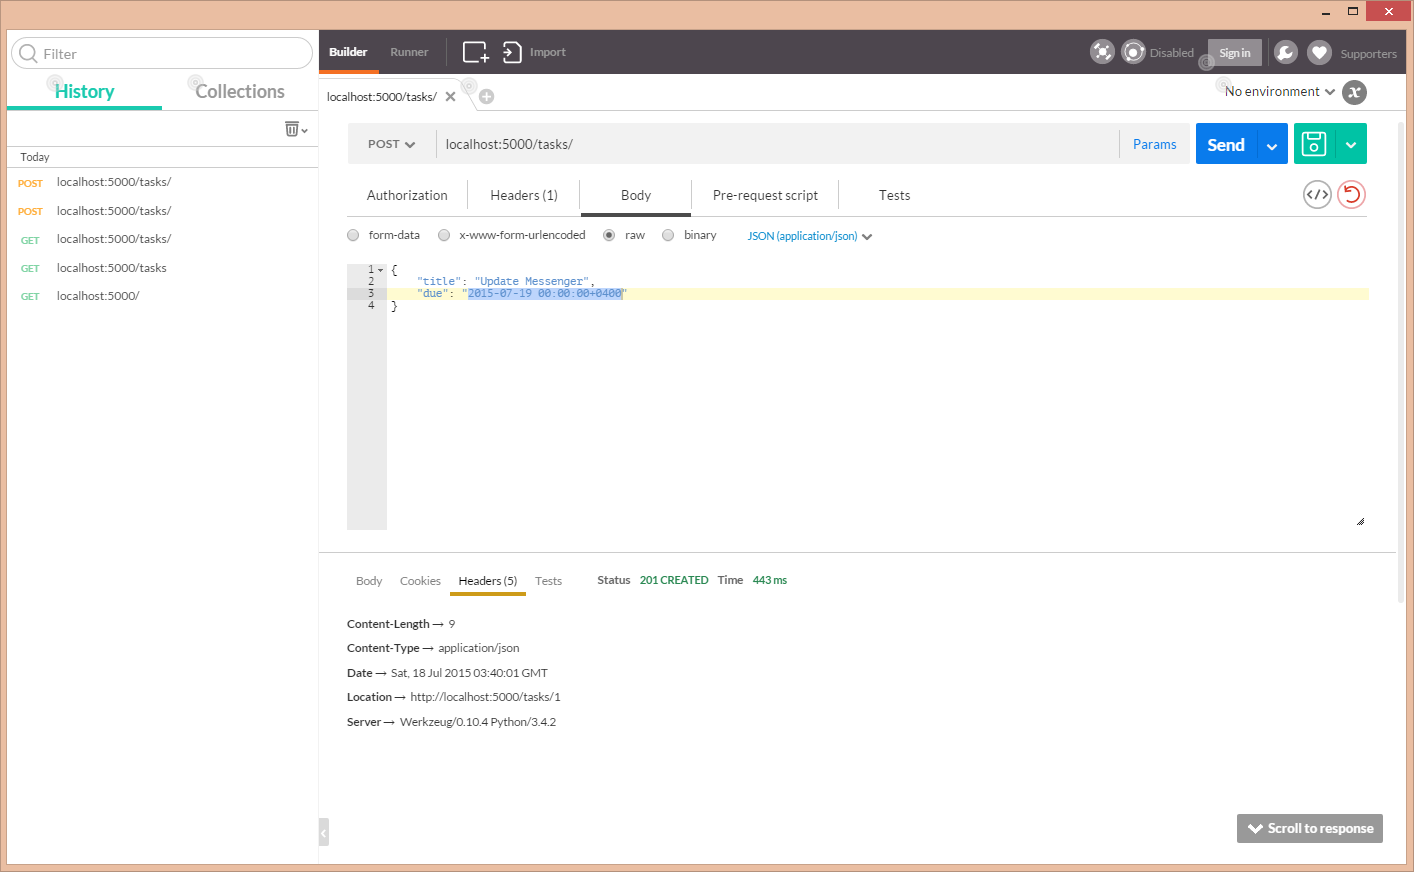
If you prefer a graphical interface, you might want to try the Postman Google Chrome extension (pictured below).
Listing our tasks
Send a GET request to /tasks/. Here’s how to do it in cURL:
$ curl localhost:5000/tasks/
[]
The response is a JSON list containing all of the tasks that we have created. Since we haven’t created any yet, we get an empty list.
Creating a new task
To create a new task, we send a POST request to /tasks/. The request
should have a Content-Type: application/json header, and the request body
must be a JSON object containing the attributes for our new task:
$ curl -i -X POST -H "Content-Type: application/json" -d '{"title": "My Task"}' localhost:5000/tasks/
HTTP/1.0 400 BAD REQUEST
Content-Type: application/json
Content-Length: 91
Server: Werkzeug/0.10.4 Python/3.4.2
Date: Sat, 18 Jul 2015 03:33:58 GMT

{"message": "The browser (or proxy) sent a request that this server could not understand."}
What’s with the error here? Well, remember that we’ve set up a validator for
our tasks resource to require a ‘due’ field with a parseable date/time. Let’s
modify our request to include one:
$ curl -i -X POST -H "Content-Type: application/json" -d '{"title": "My Task", "due": "2015-07-19 00:00:00+0400"}' localhost:5000/tasks/
HTTP/1.0 201 CREATED
Content-Length: 9
Content-Type: application/json
Date: Sat, 18 Jul 2015 03:40:01 GMT
Location: http://localhost:5000/tasks/1
Server: Werkzeug/0.10.4 Python/3.4.2

{"id": 1}
Notably, the status code returned is 201 CREATED and not 200 OK.
Additionally, Findig will try to fill the Location header, as long as
the data returned from the collection resource function is enough to build
a URL for the created resource instance. Our resource function uses
SQLASet, which returns the primary key fields.
Editing a task
For this one, we send a PUT request to the task URL. Just like when creating
a task, The request should have a Content-Type: application/json header, and
the request body must be a JSON object containing the attributes for our updated
task. We must send all fields, including the ones that we’re not updating,
since this request type overwrites all of the task’s data (unfortunately,
Findig doesn’t support PATCH
yet):
$ curl -i -X POST -H "Content-Type: application/json" -d '{"title": "My Task", "due": "2015-07-19 00:00:00+0400", "desc": "My awesome task dawg."}' localhost:5000/tasks/1
HTTP/1.0 200 OK
Content-Type: text/plain; charset=utf-8
Content-Length: 0
Server: Werkzeug/0.10.4 Python/3.4.2
Date: Sat, 18 Jul 2015 03:47:00 GMT
Deleting a task
You can probably guess this one; to do this, we send a DELETE request to the task’s URL. Let’s delete that task we just created; we’re fickle like that:
$ curl -i -X DELETE localhost:5000/tasks/1
HTTP/1.0 200 OK
Content-Type: text/plain; charset=utf-8
Content-Length: 0
Server: Werkzeug/0.10.4 Python/3.4.2
Date: Sat, 18 Jul 2015 03:52:12 GMT
It works! It all works!
Customizing error output
Remember when we sent a POST request to /tasks/ without a required
field and it gave us a cryptic error message? We should probably do something
about that. We’re gonna return a little bit more information to let the
client know what exactly has gone wrong.
To do this, we have to override the application’s default error handler, which
Findig allows us to do for specific exception types by default [1]. The key
is realising that Validator raises specific
exceptions when something goes wrong, all resolving to 400 BAD REQUEST:
findig.tools.validator.MissingFields– Raised when the validator expects one or more required fields, but the client does not send them.findig.tools.validator.UnexpectedFields– Raised when the validator receives one or more fields that it does not expect.findig.tools.validator.InvalidFields– Raised when the validator receives one or more fields that can’t be converted using the supplied converters.
Knowing this, we can update the app to send a more detailed error whenever a missing field is encountered:
@app.error_handler.register(MissingFields)
def on_missing_fields(err):
    output = {
        "error": {
            "type": "missing_fields",
            "fields": err.fields
        },
        "message": "The input is missing one or more parameters.",
    }

    # app.make_response comes from findig.json.App, and is not
    # available on findig.App.
    return app.make_response(output, status=400)
You’ll also want to import MissingFields:
from findig.tools.validator import MissingFields
Now, let’s send another request omitting a field:
$ curl -i -X POST -H "Content-Type: application/json" -d '{"title": "My Task"}' localhost:5000/tasks/
HTTP/1.0 400 BAD REQUEST
Content-Type: application/json
Content-Length: 114
Server: Werkzeug/0.10.4 Python/3.4.2
Date: Sat, 18 Jul 2015 05:09:34 GMT

{
  "error": {
    "type": "missing_fields",
    "fields": [
      "due"
    ]
  },
  "message": "The input is missing one or more parameters."
}
As expected, this time we get a more detailed error response.
Here’s a little exercise for you; why don’t you go ahead and update the app
to provide detailed messages for when the client sends an unrecognized field,
and for when the client sends badly formed data for the due field?
| [1] | This can change in very specific circumstances. In particular, if you
supply an error_handler argument to the application constructor, then
this method is no longer available; you would have to check for specific
exceptions in the function body of your custom error_handler instead. |
Wrapping up
Whew! Here’s the full source code for the app we’ve built:
from datetime import datetime

from findig.extras.sql import SQLA, SQLASet
from findig.json import App
from findig.tools.validator import Validator, MissingFields, UnexpectedFields, InvalidFields
from sqlalchemy.schema import *
from sqlalchemy.types import *


app = App()
db = SQLA("sqlite:///tasks.sqlite", app=app)
validator = Validator(app)


class Task(db.Base):
    id = Column(Integer, primary_key=True)
    title = Column(String(150), nullable=False)
    desc = Column(String, nullable=True)
    due = Column(DateTime, nullable=False)


@validator.restrict("*title", "desc", "*due")
@validator.enforce(due=validator.date("%Y-%m-%d %H:%M:%S%z"))
@app.route("/tasks/<id>")
@app.resource(lazy=True)
def task(id):
    return tasks().fetch(id=id)

@app.route("/tasks/")
@task.collection(lazy=True)
def tasks():
    return SQLASet(Task)


@app.error_handler.register(MissingFields)
def on_missing_fields(err):
    output = {
        "error": {
            "type": "missing_fields",
            "fields": err.fields
        },
        "message": "The input is missing one or more parameters.",
    }

    # app.make_response comes from findig.json.App, and is not
    # available on findig.App.
    return app.make_response(output, status=400)


if __name__ == '__main__':
    from werkzeug.serving import run_simple
    run_simple("localhost", 5000, app, use_reloader=True, use_debugger=False)
We’ve designed an built a functioning API, but we’ve only used a subset
of what Findig has to offer. Have a look at
Counter for a tool that counts hits to your
resources (this is more useful than it sounds upfront). The
findig.tools.protector module provides utilies for restrict access to
your API to authorized users/clients.
If you’re interested in supporting custom content-types, rather than just JSON, have a look at Custom applications. The process is very similar to the custom error handler we built in this tutorial.